The Stars and Mural Project
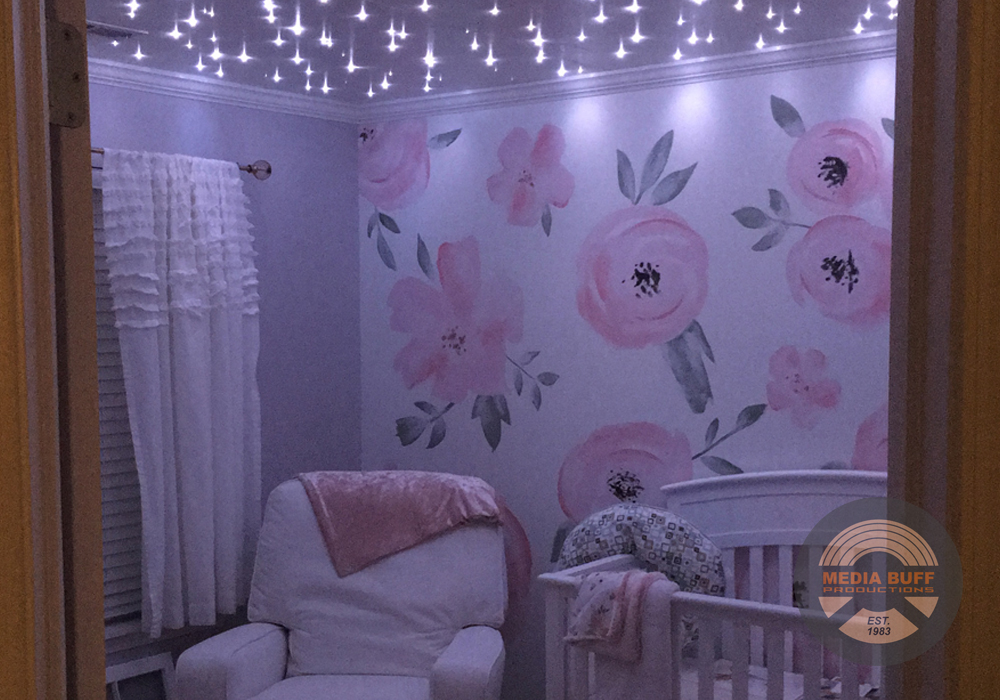
The completed baby room. Stars, flowers and all!
Bringing the stars to our little girl.
My wife and I found out we were pregnant in mid-2017. After our minds grasped this next stage in our life, we got to thinking about how to take care of our little girl.
One of the things we tackled was her bedroom. Now, we weren’t going to wait to find out what we were having until she was born. We wanted to know so we could plan out everything. Once we had our gender reveal we quickly started planning out her bedroom. One of the main features was the ceiling, which is gender neutral. The wall mural however was not.
Tackling the idea I had for the star ceiling turned out to be more complicated than I anticipated. My initial inspiration when searching Pinterest was THIS image. I couldn't really find any step-by-step tutorials telling me everything I needed to do this project, so I had to fill in the gaps. YouTube has a few tutorials but they don't tell you details.
One of the things I really had to figure out was what I would use for the lighting. I did some searching, Amazon being the main place I looked. And I came upon THIS item. It had 1,000 fiber optic strands attached to a motor that rotated and varied the light that was produced, as well as the color. I turned out to only need 500 strands, coupling up each hole and putting two strands through each hole.
Once I had the lighting figured out I had to prep the false ceiling. Laying 1”x2”’s all over the ceiling on the 4’x8’ lines. This gave room for the fiber optics to travel and keep the ceiling high. I did my best to attach the strips as securely as possible… I then prepared the panels by getting thin luan board, determining the cut lines and staggering the star holes evenly but also as randomly as I could. I also painted the board, so it was even and didn’t cover up the fiber optics once they were in place.
I then had to determine how many holes each panel had and group the fiber optics strands and thread each panel before I put it into place. Placing the panels was done one-by-one. My pregnant wife even stepped in to help despite my better judgement. I asked her to help lift these panels as I screwed them into place. Once all the panels were in place I spackled the seams and used crown moulding to hide the messy edges where the panels run into the wall. I then cut the fibers that were hanging down, a step I didn't want to do until I knew how long each strand would run. The strands were 16+ feet long, and I needed that length to run to the farthest edge of the room.
The moulding I used also covered the large hole I put in the wall that enabled the fiber optics to run from the ceiling into the closet where the engine was housed on a small shelf I added. The engine had a mild hum and took up some space, so I wanted it out of the way. As I mentioned, I only used half of the fiber optics I had. I didn’t want to cut them off, so I tucked the remaining strands into the wall.
The stars in action.
The final element was running the power from the engine back into the bedroom and down to a plug. I hid the cord in the corner and covered it with a painted piece of moulding. I then plugged the cord into a wireless plug that was activated by a wireless switch I put next to the main room switch. This was just an easy, clean and quick way to turn the ceiling on. I then have the engine remote next to our baby chair. It can change the ceiling color, brightness and speed of the engine that covers the light to create the moving light effect.
In the end, the ceiling turned out to be a very bold addition, taking a few more days (and money) than I anticipated, but it was well worth it. The ceiling keeps our little girl occupied and distracted when she’s fussy, and we think she loves it. Being such a space/sci-fi fan, it’s my little way of bringing the stars to our girl from a young age. Now, if we ever move I may have to just rip it all out and take it with us! It’s something I’d love to do in any house we’re in.
The mural progression.
Next up in our little girl’s room was the mural I wanted to add. I’ve always wanted to put a mural in our child’s room. Once we knew we were having a girl and figured out a theme for the room (we love themes), we found inspiration in a wallpaper.
The finished room.
We found THIS wallpaper, but we didn’t want to pay almost $400 for all the wallpaper we might need… I told myself and my wife, “I can paint this!” So I did. I bought a couple of small quarts of paint from Lowe’s, tinted to a couple of pink colors we would need. For the green, I took some existing house paint we had from one of the rooms in our house and tinted it as needed. The mural has several shades of pinks and greens, then some pops of black and gold (which I had already).
The client approved of her final product.
We first painted the wall white, the only white wall in the room (the rest are a shade of gray). I then sketched out the mural on some paper, to get my proportions. I then eyed the transfer of the sketch to the wall, sketching it on the wall in pencil. I then went in and layered all the colors on the wall until I got what I wanted. I used the original wallpaper inspiration as a guide for the shape and vibe of our flowers.
In the end, it took a few hours to get what we wanted. We brought in several other floral elements and the room was perfect. The star element only comes into play when it’s dark, otherwise you don’t really notice the ceiling as anything out of the ordinary!
If you have any questions about any part of this room remodel, just send me a message!
- The Media Buff